

Within the OEngine development team, I had the opportunity to be involved in the creation of the projects which are made with this engine: directly for Asterix & Obelix XXL 3 and Asterix & Obelix XXL Romastered developed by OSome Studio, but also indirectly for Curse of the Dead Gods developed by Passtech Games.
My role was to help each member of the team to work in the best possible conditions: from the improvement of the editor’s tools (3D view, manipulators, cutscene, UI…), to user support (various bugs and crashes fixes).
During this period, I also developed a texture atlas system to improve the performance of Asterix & Obelix XXL Romastered, and contributed to the Android port of White Night, carried out in partnership with Playdigious.
- Texture atlas
- 3D view improvements
- Manipulators reworking
- CMake x White Night
- Cutscenes editor
- More fixes and additions
Texture atlas
The 3D models of the environments for Asterix & Obelix XXL, as they were designed at the time, were composed of dozens of meshes, each with a material and an associated texture. The use of texture atlases for the 3D models of the environments, in order to reduce the number of draw calls, was one of the avenues studied to improve the performances of the remaster.
The image above represents the 3D model of the environment of the first sector of the Normandy level, which will be used as an example. As it can be seen on the animation, this one is made up of 110 meshes, and as many small textures. Once these are gathered in texture atlases and after some UV calculations, we get the same 3D model made up of only 10 meshes!
The procedure takes as input one or more 3D models. Firstly, the materials composing them are sorted and grouped by similarity: same shader, same parameters (double sided, …). We therefore obtain groups of similar materials, where the input parameters will be able to be merged to obtain a common ‘atlased‘ material.
Merging the input parameters uses a classic texture packing technique. Take, for example, a group of similar PBR-type materials, each of them having in input parameters a map of albedo, glossiness, specular and normal. The albedo maps for all these materials are sent to a texture packer algorithm, which returns us the coordinates of each of the textures in the final texture atlas. On the basis of these coordinates, we can generate a texture atlas per input parameter: one for the albedo, another for the specular, etc.
Some clarifications are necessary for this step:
- The texture packer algorithm I used is called crunch and was designed by Chevy Ray Johnston. It is hosted on GitHub.
- To avoid getting too large texture atlases (in this case larger than 2048x2048px), the texture packer algorithm can be run multiple times. A first time with all the textures sent to it, then if all the textures could not be integrated into the first texture atlas, it is executed again, until there are no more. This means that a group of similar materials can itself be divided into several groups, due to lack of space on the texture atlas.
- Textures placed in texture atlases are separated by a margin, to avoid that they overlap slightly on top of each other after compression. In the same idea, this implies limiting the number of mipmaps of texture atlases. Below a certain size, the margin between the textures would become insufficient to prevent bleeding.
- For this example, I explained that it is the albedo maps that are sent to the algorithm to calculate the coordinates. This is a simplification: what is sent to the algorithm is actually the size of the largest input parameter of the material to be integrated into the texture atlas. If I only sent the size of the albedo maps (which have a size of, let’s say, 128x128px), all the other parameters (specular, …) will also have this size on the texture atlas. And what if the specular map of this material was larger? It would be reduced to 128x128px on the texture atlas, which is not acceptable…
- So far I’ve only talked about texture-type input parameters. But it is also possible to merge colour-type input parameters onto a texture atlas.
- To go further, I even made sure to merge input parameters of type float: if they are registered to the procedure, this one is able to write them in one of the R G B or A channel of a texture atlas.
- These last two points imply that the ’atlased’ material uses a shader capable of understanding these special input parameters. The goal is to be able to group materials together, which could not be grouped by nature, and in the end reduce the number of meshes.
Once the ’atlased’ material and the texture atlases for each input parameter have been generated, the last step is to generate the final mesh of the group of materials. This final mesh is the assembly of all meshes whose material has been grouped into this group of materials. Furthermore, the UV coordinates of the original meshes are modified, to coincide with the coordinates of the original textures in the texture atlas.
Last but not least: the UV coordinates of the original 3D models go beyond the UV space, which was not a problem as the textures repeated themselves. But with the use of texture atlases, the textures cannot repeat themselves. To avoid overflowing texture areas in the texture atlas, a coordinate repetition calculation is applied directly in the shader.
Unfortunately, this repetition calculation led to a graphical artifact, at the precise location of the repetition: an unsightly pixel line was very apparent. However, with the help of Thomas Bonis and this article written by Mikola Lysenko, we managed to resolve this issue, which was caused by incorrect selection of the texture atlas mipmap by the GPU.
In conclusion, the ’atlased’ 3D models didn’t make it possible to obtain a significant framerate gain: the CPU gain (less object to cull, less draw calls), was counterbalanced by a decrease in GPU (larger textures to sample, mipmaps removed, more complex shader…). On the other hand, they made it possible to obtain a more constant framerate: the environments no longer consist of hundreds objects but rather a few large packages, the number of draw calls on the screen has become stable, regardless of the direction of the camera.
3D view improvements
In order to enhance the user experience of the OEngine editor, I started working to improve the ergonomics of the 3D view. Originally, the camera of the view could only be in classic perspective, which is good, but occasionally insufficient in some cases.
The first stone was laid by Thomas Bonis, who enabled to switch between a perspective camera and an orthographic camera. However, none of the tools was usable with that projection (select, rect select, manipulators…). The first step of my work was therefore to fix that problem, so that it would be possible to work with the orthographic camera.
I also completely redesigned the way that the camera positioning was calculated. My goal was to get a natural transition when switching between perspective projection and orthographic projection: it’s imperative to keep the same point of view, to prevent the user from losing his bearings.
My goal was also to make the control of the camera as pleasant as possible, by integrating animated transitions (when targeting an object for example), which greatly helps spatial understanding during camera movements. But also by the addition of the view manipulator, which allows you to easily choose the orientation of the camera between the 6 directions (X+ X- Y+ Y- Z+ Z-), and to change the projection of the view.
Manipulators reworking
In the OEngine editor, what we call ‘manipulators‘ are the tools that allow us to move, rotate or scale objects. These tools are used daily by the level designers or the level artists, so it is important that they are functional! That wasn’t the case for the rotate manipulator, which was complicated to use. So I refurbished it, just like the rotate tools found in most 3D editors (Maya, Blender, Unity…).
As well as the classic manipulators, OEngine has an additional manipulator: the box manipulator! As its name suggests, it enables to resize a box very easily, without having to successively use the move and scale manipulators. However, that one didn’t work at all when the object you wanted to scale was oriented. So I made sure to make it operational, regardless of the orientation of the object! This manipulator is finally enjoying the success it deserves with our level designers.
CMake x White Night
Since August 2019, Google requires that all of the applications released on the Play Store have a 64-bits version. Very easy to do for Fall of Hamster and Bubble Symphonia which are made with Unity … but not for White Night which works with an old version of OEngine.
This mission was done in partnership with Playdigious, specialists in the porting and publishing of existing games on new platforms, including mobile. The goal was to compile White Night under Android Studio, the most suitable development environment for an Android application. For this, my first assignment was to write the CMakeList needed by the NDK to compile the C++ source code of White Night. A tricky task, as we don’t use CMake to configure our Visual Studio projects. To keep things simple, I wrote a Python script which parse the Visual Studio project files and generate a corresponding CMakeList file.
Finally, I made sure that the C++ source code of White Night correctly build for ARMv7a and ARMv8: update of the Google Play Games library, transition from FMOD Ex to FMOD Studio, and other little trifles (includes problems…). Then Playdigious took charge of setting up the Android Studio project, making the game run smoothly, adding features, its publishing, and countless other things!

Cutscenes editor
OEngine has a cutscene editor, which as its name suggests, enables editing cutscene objects. Basically, a cutscene object is made up of several blocks, placed on a timeline. Each of the blocks has a role, such as animating characters, triggering events, or … moving the camera.
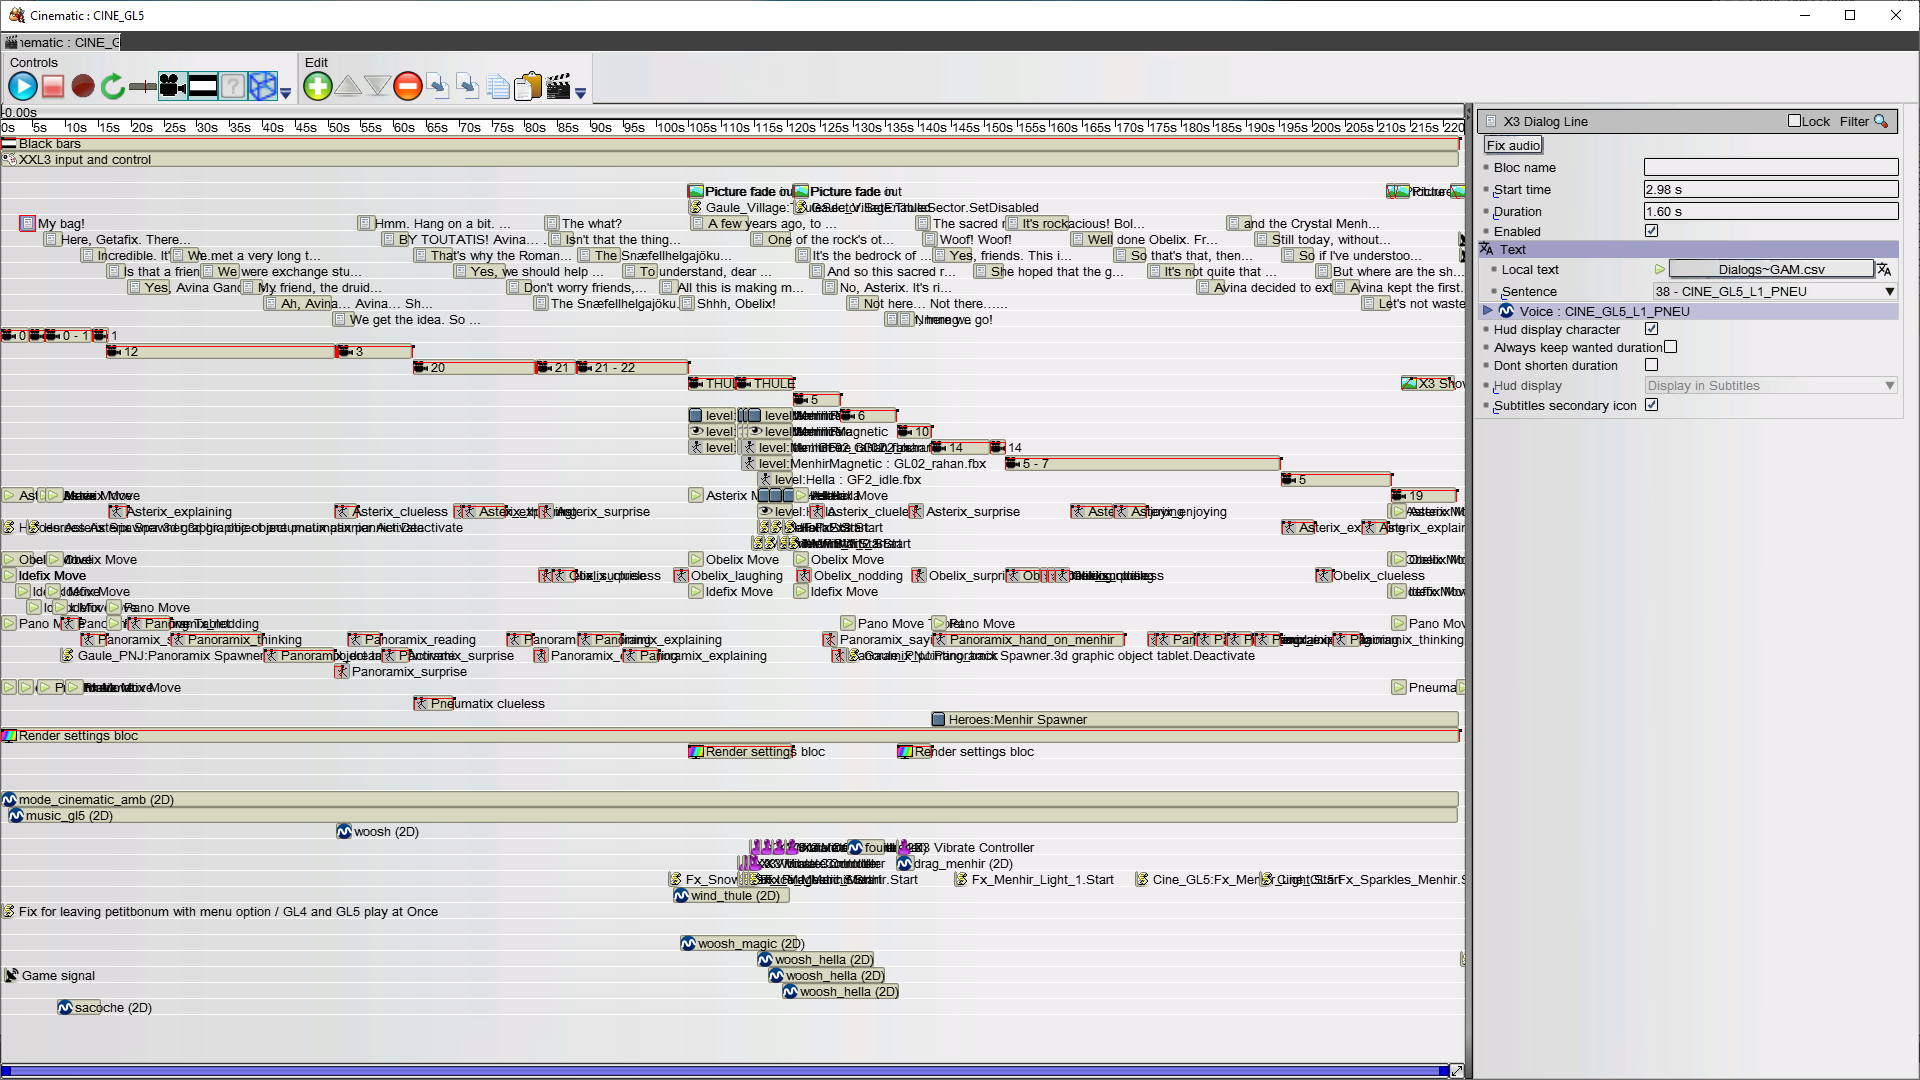
Improving the camera movement block was precisely the very first task I had to accomplish as a Tools Programmer on OEngine: the goal being to help the design of the cutscenes of Asterix & Obelix XXL 3. The idea was to add different modes of movement of the camera, like an ’orbital’ movement, lateral, on a spline, or other details such as being able to animate the fov…
As well as creating and improving the blocks needed for the XXL 3 cutscenes, I spent time improving the ergonomics of the editor itself. Details that make the tool more efficient and pleasant to use.
Added block resizing from the left (we could only do it from the right!).
Added a shortcut to easily create blocks under the mouse.

Added zoom bar, allowing to zoom in and out with precision in the timeline.

More fixes and additions
Difficult to describe my daily work: apart from the major tasks discussed above, my days also consist of a myriad of small tasks, bugs or crash fixes, always with the objective of helping engine users as much as possible. But that’s also what is interesting: it gives me the opportunity to discover and navigate all the layers of OEngine, and to learn a little more every day.
If I could list a few more tasks, I notably improved the UI objects edition:
- Added options to flip horizontally and vertically an image.
- Added centring and right alignment of texts on multiple lines.
- Added copy/paste for UI objects.
- Improved selection of UI objects in the 3D scene, which respects the hierarchy. Unable to select a disabled UI object. Added rectangular selection for these objects.
- Simplified use for the 9 slices.
- Improved undo/redo for UI objects movement.
Regarding the editor interface, I added a button to quickly access documentation for components, game objects and other windows.
I also improved the hierarchy window a bit:
- Added automatic scrolling when dragging an item.
- Fixed an inadvertent closure of hierarchy branches.
- Improved search for objects in the hierarchy, which did not always display results correctly.
Finally, I also sometimes clean up some parts of the code: for example, I centralised the projection functions (world to view point, world to screen point, and vice versa) in a single class, for simplicity. In short, I never get bored in the OEngine development team!